Autofocus

Lens Calibration
Each lens needs to go through a calibration procedure when first used. EF-X Mount Speed Booster ULTRA/Smart Adapter or EF-GFX Smart Adapter/Smart Expander will gather metadata by turning focus to infinity and minimum when the power is turned ON for the first time.
- If the lens has a focus limiter switch, set it to FULL prior to turning on the camera.
- Set camera to AF-S and use the autofocus a few times, although during the initial calibration stage the AF performance may be subpar and you may experience difficulty locking onto subjects.
- For a zoom lens, it is also necessary to zoom to both the wide end and the telephoto end of the zoom range.
- Turn off the camera to complete the calibration procedure.
- If calibration is successful the Speed Booster ULTRA or Smart Adapter or Smart Expander will no longer turn focus to minimum the next time the camera starts up.
If this calibration procedure is not completed properly, there may be problems such as excessive hunting, difficulty locking onto targets, inaccurate AF, incorrect parallax correction on X-Pro series and incorrect distance scale display on the camera (if enabled).
AF Range Limiter
AF Range Limiter is a feature available only on the newest Fujifilm camera bodies. It makes autofocus faster by reducing the range of distances traversed while searching for a subject to focus on (hunting). It also prevents an obstruction inside the frame to throw the subject out of focus during continuous autofocus.
Prerequisites:
- Camera body must support AF Range Limiter
- Lens is capable of reporting distance information.
- Some STM and USM lenses which employ focus-by-wire may not work correctly, even though they report distance information. Examples include the EF-S 18-135/3.5-5.6 IS STM and EF-S 18-135/3.5-5.6 IS USM.
- The lens must have gone through the calibration procedure beforehand.
Configuration:
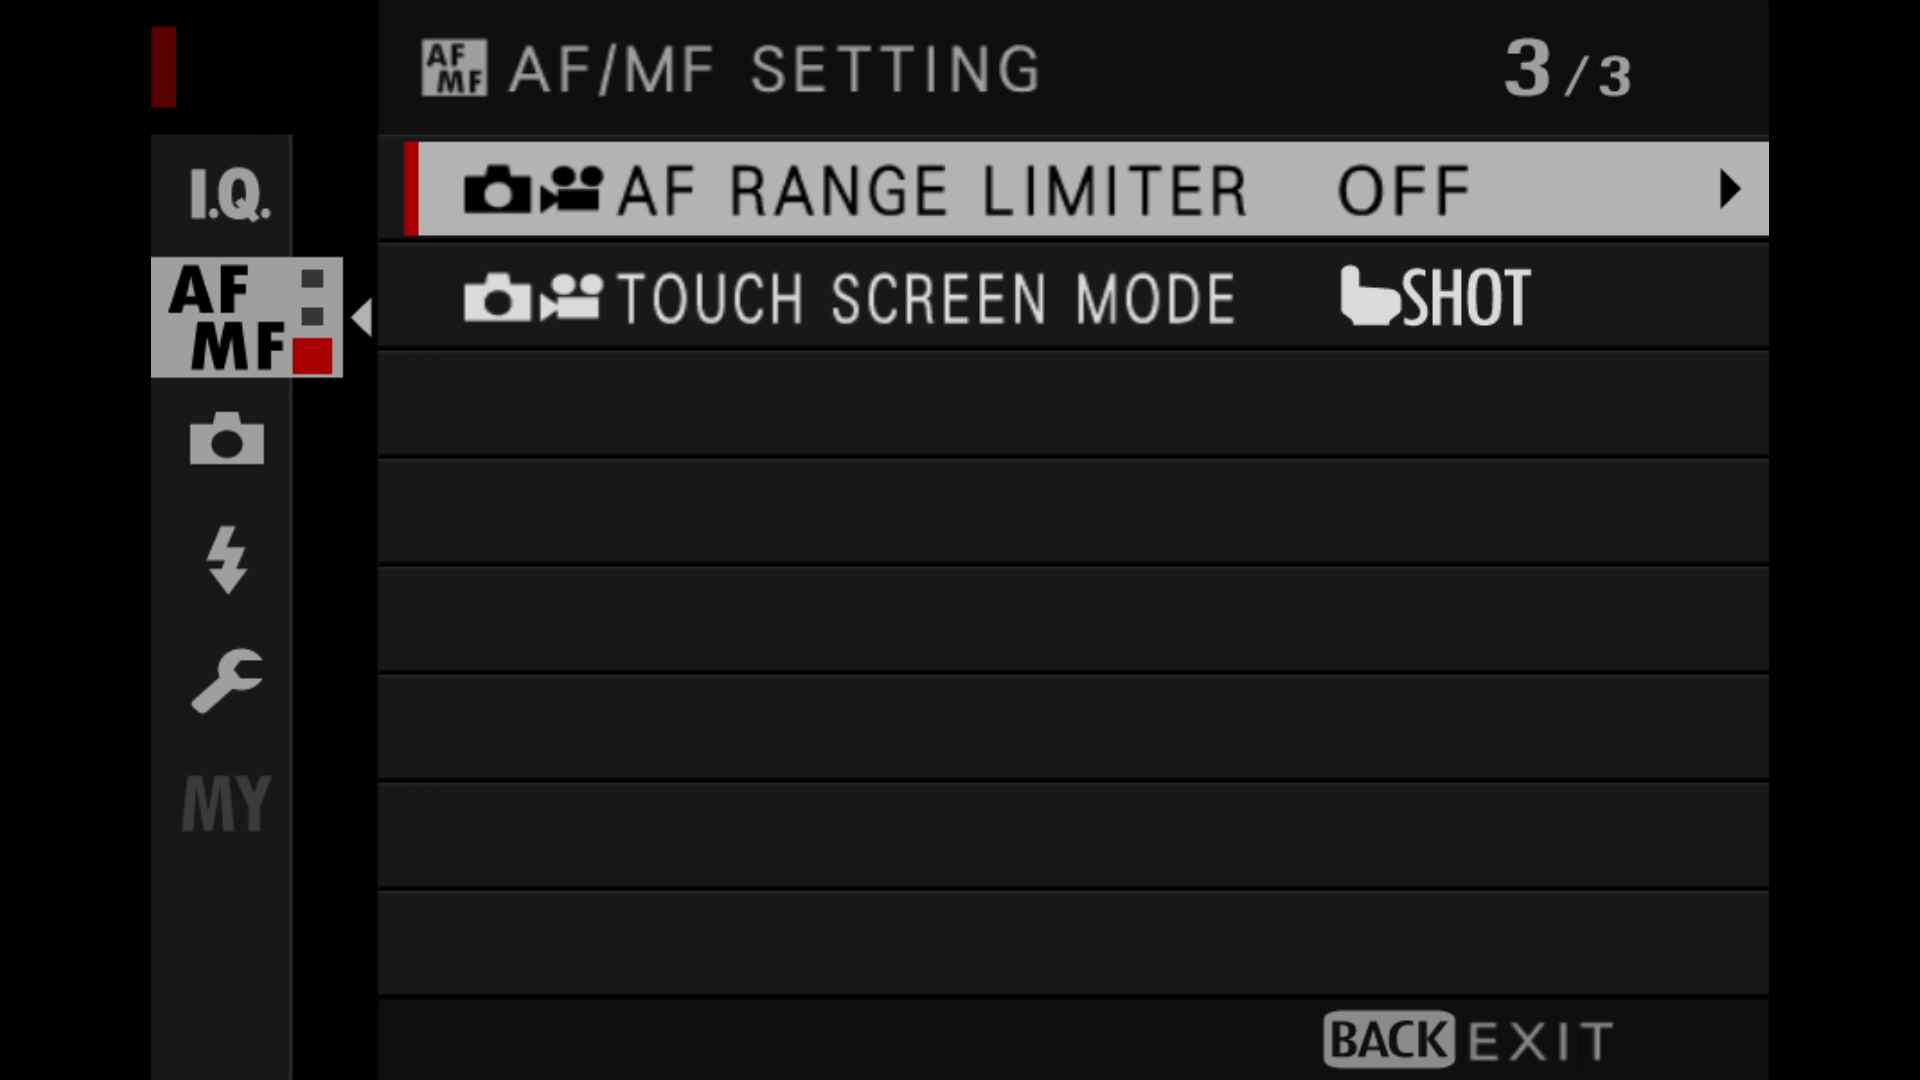 MENU => AF/MF Tab => AF RANGE LIMITER. If it is greyed out, it may be an issue with the camera body. Select the same option in movie mode.
- Set the lens' AF/MF switch to MF.
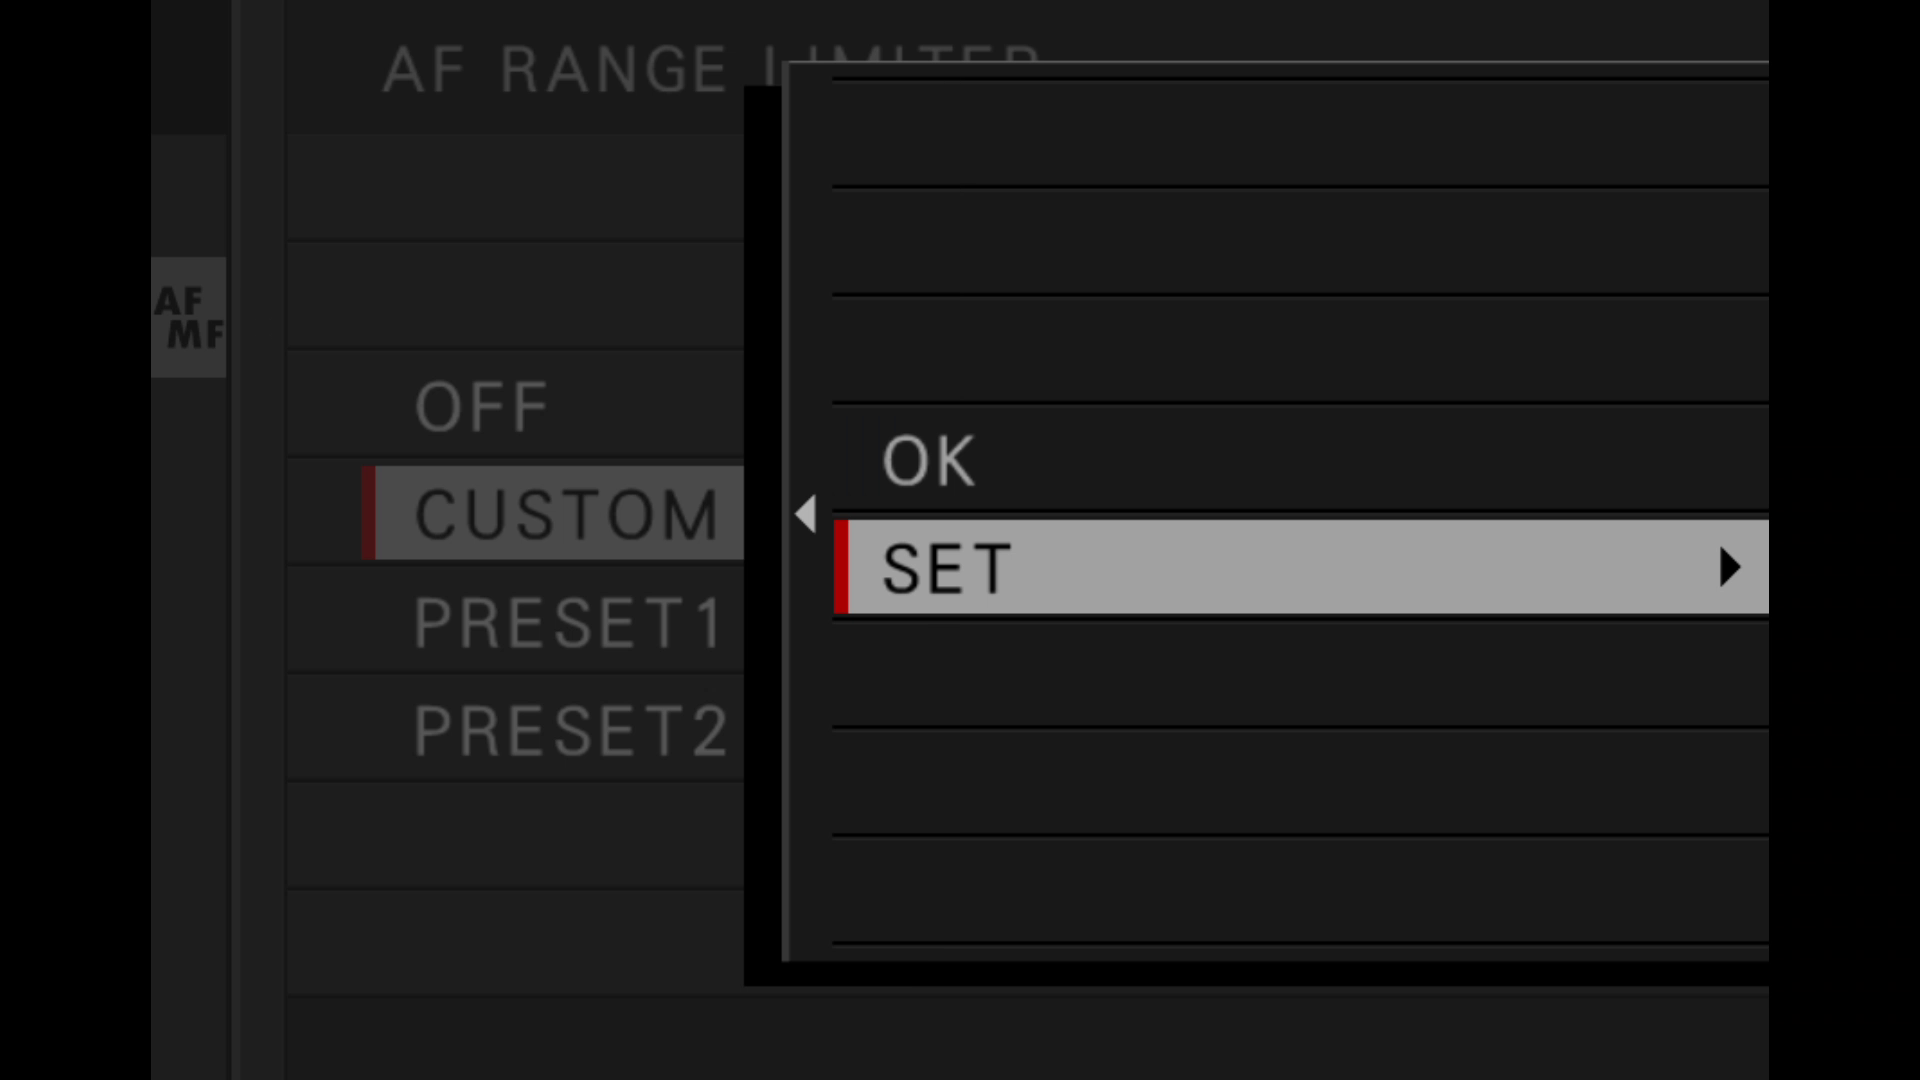 Choose CUSTOM => SET.
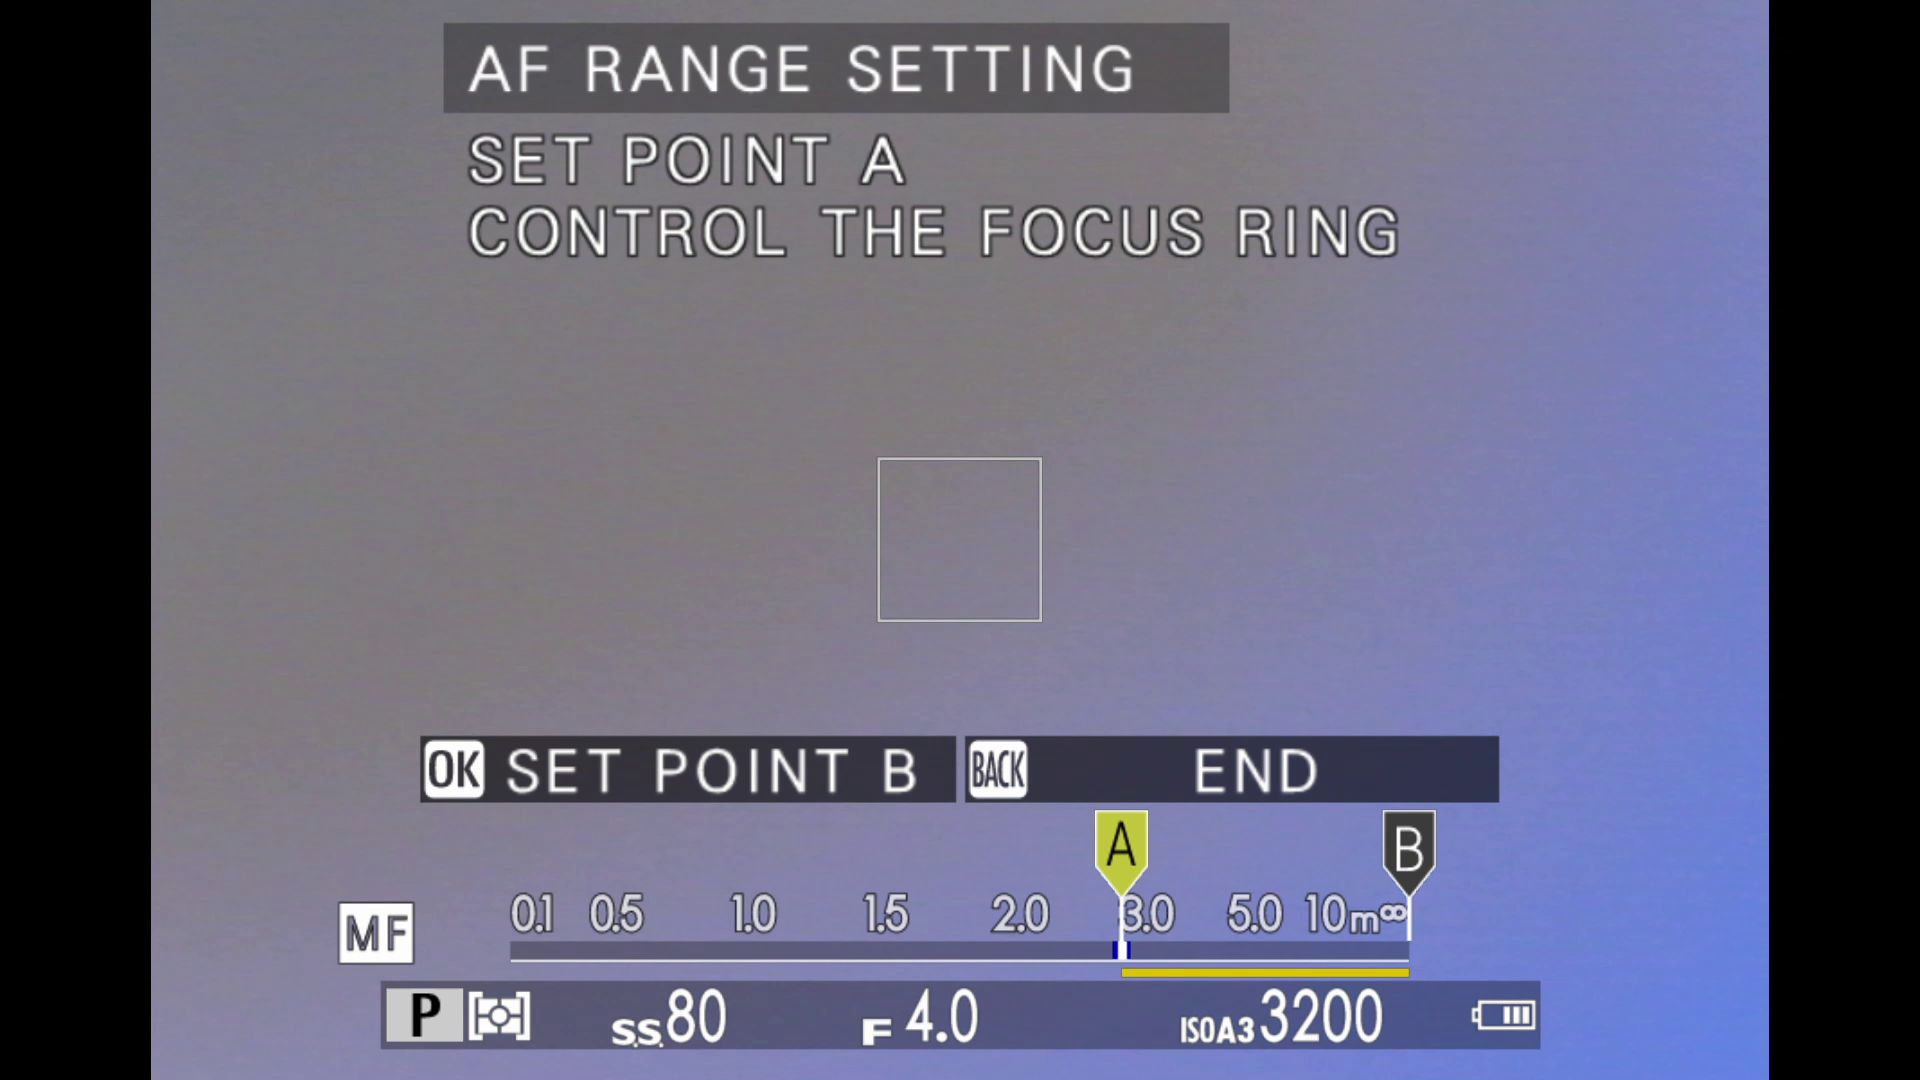 Follow the on-screen directions to select point A and point B.